When a user must wait for some task to complete in a modern graphical user interface, the interface normally provides visual feedback that something is happening, often with an indication of how much progress has been made on the task. The widgets providing this information are commonly termed progress bars (though they need not be bars), and are essential to providing a sense of application responsiveness for the user. An overview of design philosophy concerning progress bars may be found in the Progress and Activity document. Implementing a progress bar also provides an opportunity to illustrate two other important Android concepts:
This example will demonstrate how to implement progress bars and to update them from processes running on a separate thread.
A progress bar is an instance of the Android class ProgressBar. There are two basic types of progress bars that we can implement:
Traditionally, progress bars have been displayed in a Dialog window floating above the main window, with the dialog window that holds the progress bar closing when the underlying main window is ready to display the content on which we have been waiting. A more modern approach adopts a minimalist philosophy and discards floating dialogs, instead embedding the progress bar directly in the window that will hold the new content, with the new content then replacing the progress bar in that window when it is ready to display.
In this project we shall illustrate how to implement both determinate and indeterminate progress bars, in both floating dialogs and embedded inline in the main window. We shall also introduce the rudiments of implementing a custom progress bar, and illustrate ways to update a progress bar from a thread that is separate from the main UI thread.
Threads are instances of the Thread class that implement concurrent units of execution in your code. A thread has its own call stack for methods being invoked, their arguments and local variables. When an app starts, it launches in its own virtual machine. Each such virtual machine instance has at least one main thread running when it is started, there typically will be others invoked by the system for housekeeping, and the application may create additional threads for specific purposes. A common use of threads in Android applications is to move time-consuming and potentially blocking operations such as computationally-intensive loops and network operations off the main UI thread so that they do not compromise responsiveness of the user interface.
There are two standard ways of implementing threads in Android that are based largely on the Java thread model:
In either case, the resulting thread is not executed until its start() method is invoked. We shall give an example of the second approach in the progress bar examples below and an example of the first approach in the project Animator Demo.
| In this project we shall implement Threads directly, but for simple threading tasks the Android class AsyncTask may be easier to use because it abstracts much of the thread management. Specifically, AsyncTask is a helper class supplementing Thread and Handler that can perform operations on a background thread and publish results on the UI thread without the programmer having to manipulate directly either threads or handlers. We illustrate the use of AsyncTask in various other projects. For example, see the Web Data Streams I project. |
As we have seen, to facilitate UI responsiveness it is often desirable to offload tasks to new threads that the app spawns. Usually this means that at some stage the main UI thread and the new thread must communicate, but there are some strict rules about communication between threads that must be respected. The issue is particularly acute if the task on the new thread wishes to modify views associated with main UI thread, because it is strictly forbidden to do so directly.
In particular, a common task in animation programming is to modify the parameters defining some graphics on the screen implemented through a View within a repetitive loop (with some delay to control speed of change), and then to call the invalidate() method of View to request that the View redraw itself as soon as possible each time through the loop. If the graphics parameters for a View defined on the main UI thread are changed in a loop running on a separate thread, the non-UI thread is forbidden to call invalidate() on the View because it is on a different thread. Since the View cannot change unless it is redrawn, we must circumvent this restriction if we are to animate something from a separate thread. There are three common ways to do this.
A Handler sends and processes
Message and
Runnable objects associated with a thread's
MessageQueue.
When a new Handler is created, it is bound to the thread that creates it and its message queue; subsequently, it will deliver messages and runnables to that message queue and execute them as they come out of the message queue.
There are two primary uses for Handler:
In the present example it is this second function of Handler that we shall employ. |
We shall discuss these alternative approaches in more depth in the Animator Demo project. In the present example we shall use the second approach (a Handler), and in subsequent projects we shall illustrate use of the other two approaches.
Following the general procedure in Creating a New Project, either choose Start a new Android Studio project from the Android Studio homepage, or from the Android Studio interface choose File > New > New Project. Fill out the fields in the resulting screens as follows,
|
Application Name:
ProgressBarExample
Company Domain:< YourNamespace > Package Name: <YourNamespace> . progressbarexample Project Location: <ProjectPath> ProgressBarExample Target Devices: Phone and Tablet; Min SDK API 21 Add an Activity: Empty Activity Activity Name: MainActivity (check the Generate Layout File box) Layout Name: activity_main |
where you should substitute your namespace for <YourNamespace> (com.lightcone in my case) and <ProjectPath> is the path to the directory where you will store this Android Studio Project (/home/guidry/StudioProjects/ in my case). If you have chosen to use version control for your projects, go ahead and commit this project to version control.
| The style and preferred method of implementing progress bars has changed substantially since the early days of Android. We shall emphasize newer devices here and therefore have set a minimum SDK of API level 21 (Android 5.0) on this project. |
We are now ready to create the files and insert the code to construct our project. Let us first add the XML files and then the Java files. There will be a number of XML files because we are going to illustrate several ways to display progress bars.
First we define some strings and set the entry-screen layout. Edit res/values/strings.xml to read
<?xml version="1.0" encoding="utf-8"?>
<resources>
   <string name="app_name">ProgressBarExample</string>
   <string name="action_settings">Settings</string>
   <string name="Button01Text">Dialog Spinner</string>
   <string name="Button02Text">Dialog Bar</string>
   <string name="Button03Text">Inline Spinner</string>
   <string name="Button04Text">Inline Bar</string>
   <string name="Button05Text">Custom Inline Bar</string>
   <string name="displayText">Now is the time for all good men to come the aid of their country</string>
   <string name="waitText">Loading data </string>
</resources>
and edit res/layout/activity_main.xml to read
<?xml version="1.0" encoding="utf-8"?>

<LinearLayout xmlns:android="http://schemas.android.com/apk/res/android"
   android:layout_width="fill_parent"
   android:layout_height="fill_parent"
   android:orientation="vertical"
   android:paddingLeft="50dp"
   android:paddingRight="50dp"
   android:paddingTop="10dp" >

   <Button
      android:id="@+id/Button01"
      android:layout_width="fill_parent"
      android:layout_height="wrap_content"
      android:text="@string/Button01Text" >
   </Button>

   <Button
      android:id="@+id/Button02"
      android:layout_width="fill_parent"
      android:layout_height="wrap_content"
      android:text="@string/Button02Text" >
   </Button>

   <Button
      android:id="@+id/Button03"
      android:layout_width="fill_parent"
      android:layout_height="wrap_content"
      android:text="@string/Button03Text" >
   </Button>

   <Button
      android:id="@+id/Button04"
      android:layout_width="fill_parent"
      android:layout_height="wrap_content"
      android:text="@string/Button04Text" >
   </Button>

   <Button
      android:id="@+id/Button05"
      android:layout_width="fill_parent"
      android:layout_height="wrap_content"
      android:text="@string/Button05Text" >
   </Button>

</LinearLayout>
Now we add the layout files for additional screens and dialogs that will be needed. Create the XML file res/layout/displaymessage.xml and edit to read
<?xml version="1.0" encoding="utf-8"?>

<RelativeLayout xmlns:android="http://schemas.android.com/apk/res/android"
   android:id="@+id/RelativeLayout1"
   android:layout_width="match_parent"
   android:layout_height="match_parent"
   android:orientation="vertical" >

   <TextView
      android:id="@+id/display_message"
      android:layout_width="wrap_content"
      android:layout_height="wrap_content"
      android:layout_alignParentTop="true"
      android:layout_centerHorizontal="true"
      android:ems="10"
      android:paddingTop="10dp"
      android:text="@string/displayText"
      android:textSize="20sp" />

</RelativeLayout>
Create the file res/layout/progbar_horiz_only.xml and edit it to give
<?xml version="1.0" encoding="utf-8"?>

<RelativeLayout xmlns:android="http://schemas.android.com/apk/res/android"
   android:layout_width="match_parent"
   android:layout_height="match_parent" >

   <ProgressBar
      android:id="@+id/progress_bar_horiz_only"
      style="@style/ProgressBar.Horizontal.Bar"
      android:layout_width="match_parent"
      android:layout_height="wrap_content"
      android:max="200"
      android:paddingBottom="5dp"
      android:paddingLeft="20dp"
      android:paddingRight="20dp"
      android:paddingTop="5dp" />

</RelativeLayout>
Create the file res/layout/progbar_horiz.xml and edit it to give
<?xml version="1.0" encoding="utf-8"?>

<RelativeLayout xmlns:android="http://schemas.android.com/apk/res/android"
   android:id="@+id/RelativeLayout1"
   android:layout_width="wrap_content"
   android:layout_height="wrap_content"
   android:orientation="horizontal" >

   <ProgressBar
      android:id="@+id/progress_bar_horiz"
      style="@style/ProgressBar.Horizontal.Bar"
      android:layout_width="match_parent"
      android:layout_height="wrap_content"
      android:layout_alignParentLeft="true"
      android:layout_alignParentTop="true"
      android:layout_centerHorizontal="true"
      android:layout_centerVertical="true"
      android:layout_gravity="center"
      android:max="200"
      android:paddingLeft="20dp"
      android:paddingRight="20dp"
      android:paddingTop="30dp" />

   <TextView
      android:id="@+id/editText2"
      android:layout_width="wrap_content"
      android:layout_height="wrap_content"
      android:layout_alignParentTop="true"
      android:layout_centerHorizontal="true"
      android:ems="10"
      android:paddingTop="10dp"
      android:text="@string/displayText"
      android:textSize="20sp" />

</RelativeLayout>
Create the file res/layout/progbar_only.xml and edit it to give
<?xml version="1.0" encoding="utf-8"?>

<LinearLayout xmlns:android="http://schemas.android.com/apk/res/android"
   android:layout_width="wrap_content"
   android:layout_height="wrap_content"
   android:orientation="horizontal" >

   <ProgressBar
      android:id="@+id/progress_bar_only"
      style="@style/ProgressBar.Spinner.Indeterminate.Small"
      android:layout_width="wrap_content"
      android:layout_height="wrap_content"
      android:layout_gravity="center"
      android:layout_weight="1"
      android:max="200"
      android:paddingBottom="1dp"
      android:paddingLeft="20dp"
      android:paddingRight="10dp"
      android:paddingTop="1dp" />

   <TextView
      android:id="@+id/waiting"
      android:layout_width="wrap_content"
      android:layout_height="wrap_content"
      android:layout_weight="1"
      android:ems="10"
      android:paddingBottom="1dp"
      android:paddingLeft="20dp"
      android:paddingTop="1dp"
      android:text="@string/waitText"
      android:textSize="16sp" />

</LinearLayout>
Create the file res/layout/progbar.xml and edit it to give
<?xml version="1.0" encoding="utf-8"?>

<RelativeLayout xmlns:android="http://schemas.android.com/apk/res/android"
   android:id="@+id/RelativeLayout1"
   android:layout_width="wrap_content"
   android:layout_height="wrap_content"
   android:orientation="vertical" >

   <!-- This indeterminate progress bar has a material design theme -->

   <ProgressBar
      android:id="@+id/progress_bar"
      android:theme="@style/indeterminateMaterialProgress"
      style="@style/Widget.AppCompat.ProgressBar"
      android:layout_width="match_parent"
      android:layout_height="wrap_content"
      android:layout_alignParentLeft="true"
      android:layout_alignParentTop="true"
      android:layout_centerHorizontal="true"
      android:layout_centerVertical="true"
      android:layout_gravity="center"
      android:max="200"
      android:paddingLeft="20dp"
      android:paddingRight="20dp"
      android:paddingTop="30dp" />

   <TextView
      android:id="@+id/editText1"
      android:layout_width="wrap_content"
      android:layout_height="wrap_content"
      android:layout_alignParentTop="true"
      android:layout_centerHorizontal="true"
      android:ems="10"
      android:paddingTop="10dp"
      android:text="@string/displayText"
      android:textSize="20sp" />

</RelativeLayout>
Now some XML that will define some custom themes and styles is required. Create the file res/drawable/custom_progress_bar.xml. (Note: this is in the directory res/drawable. Create it by right-clicking on res/drawable and select New > File and giving it the name custom_progress_bar.xml with the .xml extension. If you try to create this XML file in the usual way using File > New > XML, Android Studio will place the file in the wrong directory.) Edit this file to give
<?xml version="1.0" encoding="utf-8"?>
<layer-list xmlns:android="http://schemas.android.com/apk/res/android" >

   <!-- Define background color gradient -->
   <item android:id="@android:id/background">
      <shape>
            <gradient
               android:angle="90"
               android:centerColor="#cccccc"
               android:centerY="1.0"
               android:endColor="#bbbbbb"
               android:startColor="#dddddd" />
      </shape>
   </item>

   <!-- Define progress bar color gradient -->
   <item android:id="@android:id/progress">
      <clip>
            <shape>
               <gradient
                  android:angle="270"
                  android:centerColor="#ffbb33"
                  android:centerY="1.0"
                  android:endColor="#ffaa22"
                  android:startColor="#ff8800" />
            </shape>
      </clip>
   </item>

</layer-list>
Next open the file res/values/styles.xml and edit it to add the lines shown in red in the following listing:
<resources>

   <!-- Base application theme. -->
    <style name="AppTheme" parent="Theme.AppCompat.Light.DarkActionBar">
        <!-- Customize your theme here. -->
        <item name="colorPrimary">@color/colorPrimary</item>
        <item name="colorPrimaryDark">@color/colorPrimaryDark</item>
        <item name="colorAccent">@color/colorAccent</item>
    </style>

   <!--
   Custom ProgressBar themes.  See
      http://stackoverflow.com/questions/12316365/showing-a-holo-themed-activity-circle
   Custom definitions may be necessary to keep progress bars from defaulting to older non-holo
   themes on new devices.  To see various options, go to
      http://developer.android.com/reference/android/R.style.html
   and search on "ProgressBar" in the webpage.
   -->

   <style name="ProgressBar.Horizontal.Indeterminate" parent="@android:style/Widget.Holo.Light.ProgressBar.Horizontal">
      <item name="android:layout_width">wrap_content</item>
      <item name="android:layout_height">wrap_content</item>
      <item name="android:indeterminate">true</item>
   </style>

   <style name="ProgressBar.Spinner.Indeterminate.Small" parent="@android:style/Widget.Holo.Light.ProgressBar.Small">
      <item name="android:layout_width">wrap_content</item>
      <item name="android:layout_height">wrap_content</item>
      <item name="android:indeterminate">true</item>
   </style>

   <style name="ProgressBar.Spinner.Indeterminate.Large" parent="@android:style/Widget.Holo.Light.ProgressBar.Large">
      <item name="android:layout_width">wrap_content</item>
      <item name="android:layout_height">wrap_content</item>
      <item name="android:indeterminate">true</item>
   </style>

   <style name="ProgressBar.Horizontal.Bar" parent="@android:style/Widget.Holo.Light.ProgressBar.Horizontal">
      <item name="android:layout_width">wrap_content</item>
      <item name="android:layout_height">wrap_content</item>
      <item name="android:indeterminate">false</item>
   </style>

   <!--A material design style for indeterminate spinner-->
    <style name="indeterminateMaterialProgress" parent="Theme.AppCompat.Light">
        <item name="colorAccent">@color/colorAccent</item>
    </style>

</resources>
Edit the AndroidManifest.xml file to give
<?xml version="1.0" encoding="utf-8"?>
<manifest xmlns:android="http://schemas.android.com/apk/res/android"
    package="com.lightcone.progressbarexample">

    <application
        android:allowBackup="true"
        android:icon="@mipmap/ic_launcher"
        android:label="@string/app_name"
        android:supportsRtl="true"
        android:theme="@style/AppTheme">
        <activity android:name=".MainActivity">
            <intent-filter>
                <action android:name="android.intent.action.MAIN" />

                <category android:name="android.intent.category.LAUNCHER" />
            </intent-filter>
        </activity>

        <activity android:name=".ProgressExample" android:label="ProgressExample"></activity>
        <activity android:name=".DisplayMessage" android:label="DisplayMessage"></activity>

    </application>

</manifest>
where the required new lines are indicated in red. That completes the entry of XML files. Let us now turn to the required Java files.
Open src/<YourNamespace>.progressbarexample/MainActivity.java and edit it to read
package <YourNamespace>.progressbarexample;

import android.app.Activity;
import android.content.Context;
import android.content.Intent;
import android.os.Bundle;
import android.widget.Button;
import android.view.View;
import android.view.View.OnClickListener;

public class MainActivity extends Activity {

      int typeBar;                                 // Type bar: 0=spinner, 1=horizontal
      Button button1, button2, button3, button4, button5;
      DialogFrag fragment;


      /** Called when the activity is first created. */
      @Override
      public void onCreate(Bundle savedInstanceState) {
               super.onCreate(savedInstanceState);
               setContentView(R.layout.activity_main);

               final Context context = getApplicationContext();


               // Process button to start spinner progress dialog with anonymous inner class
               button1 = (Button) findViewById(R.id.Button01);
               button1.setOnClickListener(new OnClickListener(){
                        public void onClick(View v) {
                              typeBar = 0;
                              DialogFrag.context = getApplicationContext();
                              fragment = DialogFrag.newInstance(typeBar);
                              fragment.show(getFragmentManager(), "Task 1");
                        }
               });

               // Process button to start horizontal progress bar dialog with anonymous inner class
               button2 = (Button) findViewById(R.id.Button02);
               button2.setOnClickListener(new OnClickListener(){
                        public void onClick(View v) {
                              typeBar = 1;
                              DialogFrag.context = getApplicationContext();
                              fragment = DialogFrag.newInstance(typeBar);
                              fragment.show(getFragmentManager(), "Task 2");
                        }
               });

               // Process button events for inline spinner (indeterminate) progress

               button3 = (Button) findViewById(R.id.Button03);
               button3.setOnClickListener(new OnClickListener(){
                        public void onClick(View v) {
                              ProgressExample.theCase = 0;
                              ProgressExample.custom = false;
                              Intent i = new Intent(context, ProgressExample.class);
                              startActivity(i);
                        }
               });

               // Process button events for inline horizontal-bar determinate progress

               button4 = (Button) findViewById(R.id.Button04);
               button4.setOnClickListener(new OnClickListener(){
                        public void onClick(View v) {
                              ProgressExample.theCase = 1;
                              ProgressExample.custom = false;
                              Intent j = new Intent(context, ProgressExample.class);
                              startActivity(j);
                        }
               });

               // Process button events for inline custom horizontal bar

               button5 = (Button) findViewById(R.id.Button05);
               button5.setOnClickListener(new OnClickListener(){
                        public void onClick(View v) {
                              ProgressExample.theCase = 1;
                              ProgressExample.custom = true;
                              Intent k = new Intent(context, ProgressExample.class);
                              startActivity(k);
                        }
               });
      }
}
(where <YourNamespace> should be changed to your namespace). Create the class file src/<YourNamespace>.progressbarexample/DialogFrag.java and edit it to read
package <YourNamespace>.progressbarexample;

import android.app.DialogFragment;
import android.app.ProgressDialog;
import android.os.Bundle;
import android.os.Handler;
import android.os.Message;
import android.util.Log;
import android.view.LayoutInflater;
import android.view.View;
import android.view.ViewGroup;
import android.widget.ProgressBar;
import android.content.Context;
import android.content.Intent;


public class DialogFrag extends DialogFragment {

      ProgressBar pbar;
      public static Context context;
      int barType;
      View v;

      private ProgressThread progThread;

      private static final int delay = 20;         // Milliseconds delay in update loop
      private int maxBarValue;                     // Max value horizontal progress bar

      boolean threadStopped = false;

      // Whether to implement holo dark (if false) or holo light (if true) theme for
      // dialog window that holds the progress bar.

      boolean lightTheme = true;


      // Public empty constructor.  Required for subclasses of Fragment; see
      // http://developer.android.com/reference/android/app/Fragment.html

      public DialogFrag() {

      }


      // Method to create new instance of DialogFrag, passing the integer num
      // as an argument. See the example at
      //
      //     http://developer.android.com/reference/android/app/DialogFragment.html
      //
      // This is one way to avoid defining a non-default constructor to pass arguments
      // to a Fragment, which would not be good for performance. Passing arguments
      // to a Fragment can also be accomplished using the default constructor and the
      // setArguments(Bundle, args) method of Fragment. See
      //
      //    http://developer.android.com/reference/android/app/Fragment.html#setArguments(android.os.Bundle)
      //
      // for further discussion. (It can only be called before the Fragment has been attached to an
      // activity, so setArguments() should be called immediately after constructing the Fragment.)

      static DialogFrag newInstance(int num) {
               DialogFrag f = new DialogFrag();

               // Supply num input as an argument.
               Bundle args = new Bundle();
               args.putInt("num", num);
               f.setArguments(args);

               return f;
      }

      public void onCreate(Bundle savedInstanceState){
               super.onCreate(savedInstanceState);
               barType = getArguments().getInt("num");

               // Set styles and themes for the DialogFragment window holding the ProgressBar
               // (custom styles and themes for the progress bar itself are set in res/values/styles.xml)

               int style = DialogFragment.STYLE_NO_TITLE;
               int theme = android.R.style.Theme_Holo_Dialog;
               if(lightTheme){
                        theme = android.R.style.Theme_Holo_Light_Dialog;
               }
               this.setStyle(style, theme);

      }

      /** This (optional) callback is executed when the fragment is ready to instantiate its
         * user interface (if it has one).  The variable inflater is the LayoutInflater that will
         * inflate any views in the fragment, the variable container is the parent view that the
         * fragment UI should be attached to (the fragment does not add the view itself, but container
         * can be used to generate the LayoutParams for the view). If savedInstanceState is not null,
         * the fragment is being reconstructed from a previous saved state. This callback is executed between
         * onCreate() and onActivityCreated() and returns the View for the fragment's UI, or null if
         * there is no UI.  If a View is returned by this method, the onDestroyView() callback will be
         * called when the View is being released.
         */

      @Override
      public View onCreateView(LayoutInflater inflater, ViewGroup container,
                        Bundle savedInstanceState) {

               // Inflate the views and get handles to its elements here. We cannot use
               // findViewById in onCreate() in the usual way because this is a Fragment,
               // not an Activity, and only when this callback fires (which occurs after onCreate() is executed)
               // is the Fragment ready to lay out its view.

               if(barType == 0){
                        v = inflater.inflate(R.layout.progbar_only, container, false);
                        pbar = (ProgressBar) v.findViewById(R.id.progress_bar_only);

               } else {
                        v = inflater.inflate(R.layout.progbar_horiz_only, container, false);
                        pbar = (ProgressBar) v.findViewById(R.id.progress_bar_horiz_only);

               }

               // Set the max value of the progress bar
               maxBarValue = pbar.getMax();

               // Start the background thread
               progThread = new ProgressThread(handler);
               progThread.start();

               return v;
      }

      // Callback executed when fragment View is being released. Not doing anything
      // with it now.

      @Override
      public void onDestroy(){
               super.onDestroy();
      }


      // Method to close dialog fragment window.  Need the check on threadStopped
      // because this method can be called twice before the thread gets
      // stopped and if called a second time an exception will be thrown since
      // the fragment was already dismissed the first time it was called.

      private void closeDialog(){
               if(!threadStopped){
                        Intent i = new Intent(context, DisplayMessage.class);
                        startActivity(i);
                        if(!this.isDetached()) dismiss();
               }
      }

      /**
         * Handler on the main (UI) thread that will receive messages from the
         * second thread and update the progress. Note that Eclipse warns that this
         * class should be declared static to prevent a possible memory leak
         * (because as an inner class it could prevent garbage collection for the
         * outer enclosing class).  However, it seems from the explanation that there is
         * no problem if (as is true here) the Handler is dealing with messages from a
         * thread other than the main thread.
         */

      final Handler handler = new Handler() {
               public void handleMessage(Message msg) {

                        // Get the current value of the variable total from the message data
                        // and update the progress bar.

                        int total = msg.getData().getInt("total");

                        pbar.setProgress(total);
                        if (total > maxBarValue){

                              // Stop the background thread
                              progThread.setState(ProgressThread.DONE);

                              // Hide the dialog window contents and close it
                              pbar.setVisibility(ProgressBar.INVISIBLE);
                              v.setVisibility(View.INVISIBLE);
                              closeDialog();
                              threadStopped = true;

                        }
               }
      };

      // Inner class that performs progress calculations on a second thread.  Implement
      // the thread by subclassing Thread and overriding its run() method.  Also provide
      // a setState(state) method to stop the thread gracefully. This can be done
      // more compactly, as illustrated in the class ProgressExample, and could also be
      // done with AsyncTask rather than the explicit Java threads we have used here.

      private class ProgressThread extends Thread {

               // Class constants defining state of the thread
               final static int DONE = 0;
               final static int RUNNING = 1;

               Handler mHandler;
               int mState;
               int total;

               // Constructor with an argument that specifies Handler on main thread
               // to which messages will be sent by this thread.

               ProgressThread(Handler h) {
                        mHandler = h;
               }

               // Override the run() method that will be invoked automatically when
               // the Thread starts.  Do the work required to update the progress bar on this
               // thread but send a message to the Handler on the main UI thread to actually
               // change the visual representation of the progress.

               @Override
               public void run() {
                        mState = RUNNING;
                        total = 0;
                        threadStopped = false;

                        while (mState == RUNNING) {
                              // The method Thread.sleep throws an InterruptedException if Thread.interrupt()
                              // were to be issued while thread is sleeping; the exception must be caught.
                              try {
                                       // Control speed of update (but precision of delay not guaranteed)
                                       Thread.sleep(delay);
                              } catch (InterruptedException e) {
                                       Log.e("ERROR", "Thread was Interrupted");
                              }

                              // Send message (with current value of  total as data) to Handler on UI thread
                              // so that it can update the progress bar.

                              Message msg = mHandler.obtainMessage();
                              Bundle b = new Bundle();
                              b.putInt("total", total);
                              msg.setData(b);
                              mHandler.sendMessage(msg);

                              total++;
                        }
               }

               // Set current state of thread (use value state=ProgressThread.DONE to stop thread)
               public void setState(int state) {
                        mState = state;
               }
      }
}
Create the file src/<YourNamespace>.progressbarexample/DisplayMessage.java and edit it to read
package <YourNamespace>.progressbarexample;

import android.os.Bundle;
import android.support.v4.app.FragmentActivity;

public class DisplayMessage extends FragmentActivity {

      @Override
      public void onCreate(Bundle savedInstanceState) {
               super.onCreate(savedInstanceState);
               setContentView(R.layout.displaymessage);

      }

}
Finally, create the file src/<YourNamespace>.progressbarexample/ProgressExample.java and edit it to read
package <YourNamespace>.progressbarexample;

import android.app.Activity;
import android.graphics.drawable.Drawable;
import android.os.Bundle;
import android.os.Handler;
import android.util.Log;
import android.widget.EditText;
import android.widget.ProgressBar;
import android.widget.TextView;

public class ProgressExample extends Activity {

      // Delay in ms for thread runner
      private static final int DELAY_MS = 20;

      // Class constants defining state of the thread
      private static final int DONE = 0;
      private static final int RUNNING = 1;
      private int threadState = RUNNING;

      private int maxBar;

      private ProgressBar pbar;
      private int progress = 0;
      private TextView textField;

      // Handler to implement updates from the background thread to views
      // on the main UI

      private Handler handler = new Handler();

      public static int theCase;
      public static boolean custom;


      protected void onCreate(Bundle savedInstanceState) {

               super.onCreate(savedInstanceState);

               // Get handles to progress bar and textfield, and set initial visibility

               if(theCase == 0){
                        setContentView(R.layout.progbar);
                        pbar = (ProgressBar) findViewById(R.id.progress_bar);
                        textField = (TextView) findViewById(R.id.editText1);
               } else {
                        setContentView(R.layout.progbar_horiz);
                        pbar = (ProgressBar) findViewById(R.id.progress_bar_horiz);
                        textField = (TextView) findViewById(R.id.editText2);

                        // Example of customizing horizontal bar.  See:
                        //     http://stackoverflow.com/questions/16893209
                        //        /how-to-customize-a-progress-bar-in-android?lq=1
                        //     http://www.tiemenschut.com/how-to-customize-android-progress-bars/
                        // The custom format is defined in res/drawable/custom_progress_bar.xml

                        if(custom){
                              Drawable draw = getResources().getDrawable(R.drawable.custom_progress_bar);
                              pbar.setProgressDrawable(draw);
                        }
               }

               pbar.setVisibility(ProgressBar.VISIBLE);
               maxBar = pbar.getMax();
               textField.setVisibility(EditText.INVISIBLE);

               // Operation on background thread that updates the main
               // thread through handler.

               new Thread(new Runnable() {
                        public void run() {
                              while (threadState == RUNNING) {

                                       // Simulate a time-consuming job
                                       progress = longTask();

                                       // Check to see if finished
                                       if(progress > maxBar){
                                                threadState = DONE;
                                       }

                                       // Update the progress bar.  We cannot update views on the
                                       // main UI directly from this thread, so we use the Handler
                                       // handler to do it.

                                       handler.post(new Runnable() {
                                                public void run() {
                                                      pbar.setProgress(progress);
                                                      if(threadState == DONE) {
                                                               pbar.setVisibility(ProgressBar.INVISIBLE);
                                                               textField.setVisibility(EditText.VISIBLE);
                                                      }
                                                }
                                       });
                              }
                        }
               }).start();

      }

      // This method simulates a time-consuming task run on the background
      // thread by inserting a delay of DELAY_MS milliseconds each time though
      // the thread loop.

      private int longTask(){
               try {
                        // Control speed of update (but precision of delay not guaranteed)
                        Thread.sleep(DELAY_MS);
               } catch (InterruptedException e) {
                        Log.e("ERROR", "Thread was Interrupted");
               }
               return progress + 1;
      }
}
This completes entry of the code and the project should now compile without errors.
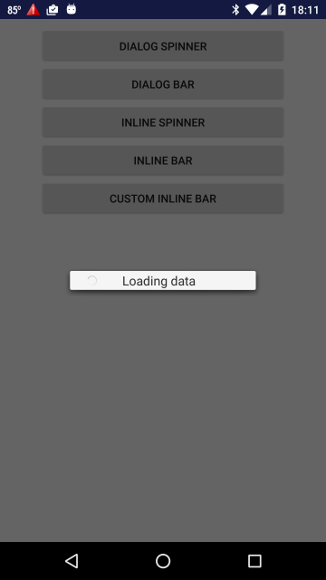
If you execute this project on a device or emulator, you should see an initial display with five buttons. If the first button is pressed you should see a display like the left figure below, and you should see a display like the right figure below if the second button is pressed.
 |
 |
In the left figure above an indeterminate progress bar is displayed as a small rotating circle (often termed a spinner). In the right figure above a determinate progress bar is displayed as a continuously increasing blue bar (in the Holo Light theme).
|
Best practices in Android design emphasize conveying information graphically where possible, with minimal text. In the above example for the indeterminate spinner we have shown how to display a text message associated with the spinner. Generally, you should not display such text unless it conveys additional important information. If you implement consistent progress bar design, a user of your app should quickly become adapted to interpreting the spinner graphic correctly without having to add clarifying text. One example of where text might be useful is if the background operation is long but indeterminate in length. Then it may be a user-friendly gesture to display a message to the effect that "this may take a while" so that the user knows that something useful is happening and your code has not just gotten into an infinite loop. But generally, eschew text on progress bars (and other iconic graphics) unless it conveys essential additional information.
Notice also that in the above spinner graphic example the spinner is hard to see because it is of light color displayed against the light background. In this case a different choice for the style making either the spinner or the background darker might be useful. For example, in DialogFrag.java the boolean variable lightTheme can be set to false to produce a dark background for the spinner. |
In the preceding images the progress bar is displayed in a dialog window floating above the main display, with the display dimmed in the background. In the following two figures we illustrate a more modern variant in which the progress bar is displayed inline rather than in a floating dialog.
 |
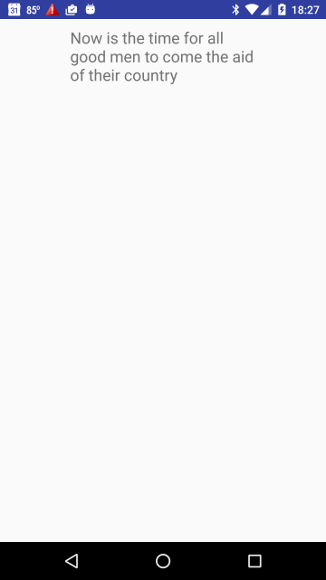 |
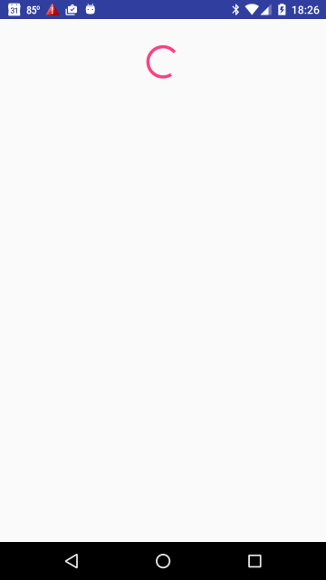
The left figure shows a variant of the indeterminate spinner where with a rotating circle when the third button is pressed. As soon as the thread returns, the progress bar disappears and is replaced inline by the text field that we were waiting to display (right figure above).
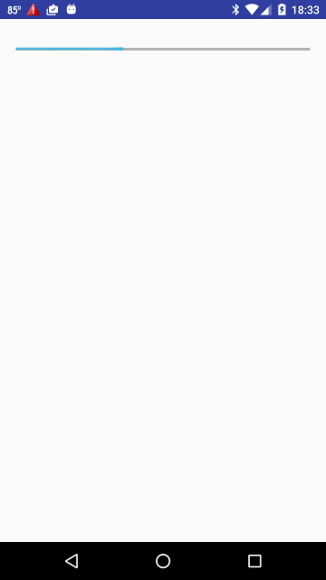
Pressing the fourth button gives the progress bar displayed inline in the figure below left, which is a determinate horizontal progress bar. Pressing the fifth button gives the determinate progress bar displayed inline in the figure below right, which illustrates defining a custom style for a progress bar.
 |
 |
In both cases the progress bar is displayed inline rather than in a floating dialog window and when the progress bar disappears it is replaced immediately by the content to be loaded in the same window, as was illustrated above for the inline indeterminate progress bar.
The comments in the files MainActivity.java, ProgressExample.java and DialogFrag.java outline the functionality but a somewhat more expansive description is given here.
| The class DialogFragment extends Fragment, which is a piece of an application's user interface or behavior that can be placed in an Activity. A DialogFragment is a Fragment that displays a dialog window, floating on top of its activity's window. The Fragment in the present application contains a Dialog object. (However, one should not make direct calls on this Dialog but should instead control it through the API described at DialogFragment.) |
Let us now discuss in more detail the classes defined by DialogFrag.java and ProgressExample.java, and how they implement these various progress bars.
The class DialogFrag creates a dialog window that is a Fragment, which in this application will hold a ProgressBar. Because DialogFrag is a subclass of Fragment, it has to be treated somewhat differently than an Activity. Notice first that because of the way the fragment functions (it is possibly instantiated and reinstantiated multiple times), any subclass of Fragment must have a default empty (no arguments) constructor, and for performance reasons it is discouraged to define additional (overloaded) constructors that pass arguments. Thus, we cannot pass arguments to a fragment through its constructor. The code segment
static DialogFrag newInstance(int num) {
   DialogFrag f = new DialogFrag();

   // Supply num input as an argument.
   Bundle args = new Bundle();
   args.putInt("num", num);
   f.setArguments(args);

   return f;
}
illustrates one way to create an instance of DialogFrag and pass arguments to it. In this example an instance of DialogFrag is created with the default constructor, and then we use the setArguments(Bundle b) method of Fragment to pass the arguments. Then we create the new DialogFrag using statements of the form
DialogFrag fragment = DialogFrag.newInstance(typeBar);
rather than DialogFrag fragment = new DialogFrag( ).
A fragment behaves in many respects like an Activity, but it cannot function separate from the activity in which it is embedded. One implication is that, unlike in an Activity where we can inflate views and get handles to them from the onCreate( ) method, for a subclass of Fragment we must wait for the onCreateView(LayoutInflater inflater, ViewGroup container, Bundle savedInstanceState) method that FragmentDialog inherits from Fragment to be called, indicating the the fragment within the activity is ready to lay out its views. (This method will generally be called after onCreate( ).) Thus we use onCreate( ) primarily to set some styles and use onCreateView( ) to inflate the views and get handles to them. In onCreateView( )
Once the view is inflated, we use the findViewById( ) method of View to get a handle to the progress bars defined in the layout files progress_bar_only.xml and progress_bar_horiz_only.xml.
The inner class ProgressThread subclasses Thread. We use an instance of this class to run a background thread that simulates a delay when the progress dialog is displayed. This class uses a Handler to update the views in the DialogFrag defined on the main thread, as described below. These updates supply the "progress" that is displayed by the progress bars, and finally cause the DialogFrag to be closed and the new content that we were waiting for to be displayed.
We define the Handler object handler using an inner class. This uses the Handler method handleMessage(Message msg), where Message defines a message containing a description and arbitrary data object that can be sent to a Handler.
The inner class ProgressThread implements our thread to update the progress bar by extending Thread and overriding its run() method.
In this example the updating task was a trivial one and it wasn't really essential to move the update to a separate thread. But this simple case serves as a prototype of how to update progress to the UI thread from a secondary thread for cases where the task on the second thread might not be so trivial.
The class ProgressExample defines an Activity into which we insert a ProgressBar. Because this is an activity, we can set the progress bar views and get handles to the progress bars in the onCreate( ) method, unlike in the DialogFragment described above where we had to wait for the onCreateView( ) method to be called.
Since in these examples we wish the progress bar to be displayed inline and to be replaced by the content of a TextField, we define both the ProgressBar and Textfield in the same layout file (e.g., see progbar.xml), and use their setVisibility( ) methods (which both inherit from View) to control whether the progress bar or the textfield is visible at a given time. In these examples we also use a background thread with delay to simulate the progress bar display update as in DialogFrag, but here we do it in a more compact way using an anonymous inner class.
The looks of the progress bars and dialog windows are controlled by styles that are set in res/values/styles.xml (see the Themes, Styles, and Preferences project for further discussion). In particular, the progress bars used in this project are defined by the styles
<style name="ProgressBar.Horizontal.Indeterminate" parent="@android:style/Widget.Holo.Light.ProgressBar.Horizontal">
      <item name="android:layout_width">wrap_content</item>
      <item name="android:layout_height">wrap_content</item>
      <item name="android:indeterminate">true</item>
   </style>

   <style name="ProgressBar.Spinner.Indeterminate.Small" parent="@android:style/Widget.Holo.Light.ProgressBar.Small">
      <item name="android:layout_width">wrap_content</item>
      <item name="android:layout_height">wrap_content</item>
      <item name="android:indeterminate">true</item>
   </style>

   <style name="ProgressBar.Spinner.Indeterminate.Large" parent="@android:style/Widget.Holo.Light.ProgressBar.Large">
      <item name="android:layout_width">wrap_content</item>
      <item name="android:layout_height">wrap_content</item>
      <item name="android:indeterminate">true</item>
   </style>

   <style name="ProgressBar.Horizontal.Bar" parent="@android:style/Widget.Holo.Light.ProgressBar.Horizontal">
      <item name="android:layout_width">wrap_content</item>
      <item name="android:layout_height">wrap_content</item>
      <item name="android:indeterminate">false</item>
   </style>

   <!--A material design style for indeterminate spinner-->
    <style name="indeterminateMaterialProgress" parent="Theme.AppCompat.Light">
        <item name="colorAccent">@color/colorAccent</item>
    </style>
where each style definition begins with an existing ProgressBar style specified by the parent attribute and adds additional properties to it using the item tags. Thus, for example, in the layout file res/layout/progbar_horiz_only.xml the style of the progress bar is specified as the ProgressBar.Horizontal.Bar custom style defined above, which gives a determinate horizontal bar with the Holo Light look. To see various options for ProgressBar styles that can be used as a starting point for custom styles, go to R.style and search on "ProgressBar" in the resulting webpage.
| This project was converted from an earlier one that used the (then current) holo theme. Since our emphasis here is on functionality, the examples have been for the most part left in the holo theme but for the indeterminate spinner launched using the third button we give an example of using the newer material design theme. |
The custom progress bar displayed by pressing the fifth button on the main interface is implemented by overriding the default Drawable objects that Android uses to display the progress bar graphics (see the Drawable Resources document). These custom drawables are defined in res/drawable/custom_progress_bar.xml (which, you will note, is not the usual location for an XML file in an Android project). There we define two new shapes filled by color gradients, one for the background and one for the bar itself. The tags used to implement these shapes are described in the Shape Drawable and Clip Drawable subsections of the Drawable Resources document. The custom drawables are then substituted for the defaults through the code
if(custom){

   Drawable draw;
   // Handle method getDrawable deprecated as of API 22
   if (Build.VERSION.SDK_INT >= Build.VERSION_CODES.LOLLIPOP) {
      // Theme required but set to null for our example
      draw = getResources().getDrawable(R.drawable.custom_progress_bar,null);
   } else {
      draw = getResources().getDrawable(R.drawable.custom_progress_bar);
   }

   pbar.setProgressDrawable(draw);
}
in ProgressExample.java, which
Although the default graphics and styles will be desirable for most applications, this example illustrates how to substitute custom drawables for progress bars when your overall design requires it.
| The complete project for the application described above is archived on GitHub at the link ProgressBarExample. Instructions for installing it in Android Studio may be found in Packages for All Projects. |
Last modified: July 6, 2016