The starting point for developing an Android app is to create the framework of a corresponding project. Android Studio permits this to be done in very simple fashion.
| The following instructions for creating a new Android project in Android Studio are based on the Linux version of Android Studio 2.1.2 current in mid-2016. For other versions of Android Studio similar information will be required, but the format for entering it may differ some from that in the current instructions. |
To create a new Android project with the Android Studio, select Start a new Android Studio project from the AS homescreen or, with the interface open, select File > New > New Project from the top menu. This should give a window similar to the following figure:

|
Fill this screen out as appropriate, where the fields have the following meaning:
|
Each application in the system must have a unique package name, which can be ensured by systematically naming packages using the same reversed domain prefix but different suffixes: com.lightcone.app1, com.lightcone.app2, ...
For practice and development you can use a default like org.myname.example (e.g., org.myname.example.myapp), but for deployment of apps for use by others you should systematically name your packages with a reversed domain that is unique (ideally an internet domain that you control, though that isn't essential).
Choose the package name carefully, since it determines organizational structure for the project and is not very easy to change later because it ends up being used in various places. The package name is typically not visible to users. It must remain the same for the life of your app if it is uploaded to the Play Store (this is how in the Play Store successive versions of an app are identified as the same app). |
Once this screen is filled out, click Next, which should give a screen like the following figure.
|
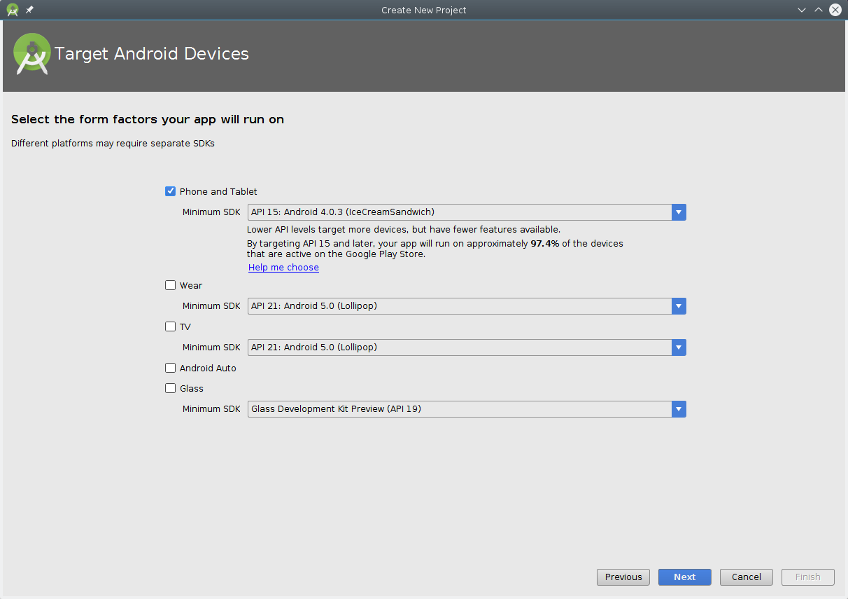
This screen specifies the devices for which we will develop the app, and the minimum version of the Android SDK that will be supported. Our discussion will concern primarily development for phones or tablets, but on this screen there are options for other formfactors such as wearables or Android TV.
The Minimum SDK is the minimum API Level required
to run your application properly. This entry automatically sets the minSdkVersion
attribute in the build.gradle file
(it was set in the AndroidManifest.xml in earlier versions of Android). Generally you should specify the lowest SDK value under which your app will run correctly, since this will target the broadest range of devices.
The minSdkVersion level is NOT the Android version number. Some Android platforms that we will use and the corresponding SDK number (in parentheses) include:
|
Set the values on this screen as desired and click Next, which should give a screen similar to the following.
|
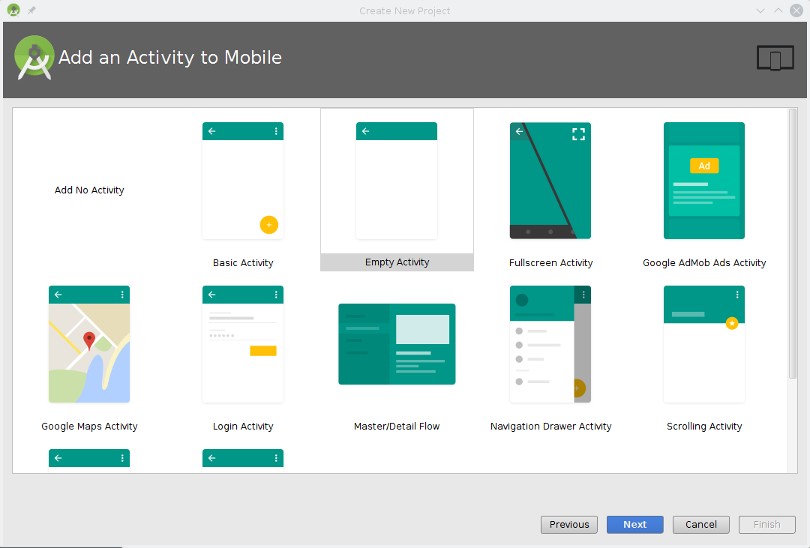
This screen allows the choice of a stub for a main activity to be inserted. Empty Activity is the typical choice but others may be more appropriate for specific tasks like a mapping application. After making a choice, click Next, which gives a screen similar to the following.
|
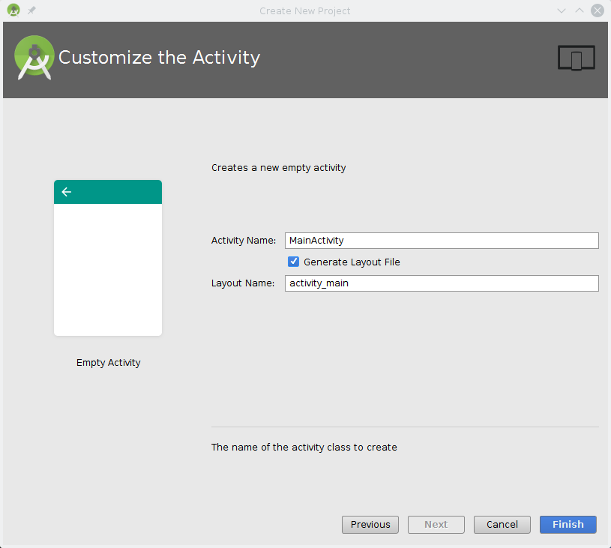
The top field gives the name of the main activity class (Java file) to create. The bottom field gives the name of the corresponding XML layout file. The defaults can be changed if desired but they are commonly called MainActivity and activity_main, respectively. Typically one will want to check the Generate Layout File box to produce a default initial layout for the main activity. When done, click Finish. This should create a new project, which will appear in the package panel on the left of the Android Studio interface, ready for editing, as illustrated in the following figure.

|
If you look at your workspace directory at this point, you will see that subdirectories and files corresponding to the new project have been created there with the same directory hierarchy displayed in the Android Studio package explorer.
Last modified: June 9, 2016