Programs can be installed and tested directly on an Android device through a USB connection between the development computer and the device. In Installing on a Device we will see how to do that, but for rapid development it is very useful to configure emulators that simulate various actual Android devices on your development computer.
Testing with Android Virtual Devices (AVD) has several advantages:
Of course the proof of the pudding is that it should run on actual devices, and emulators do a fairly good job but not a perfect one of simulating actual devices, so ultimately you want to test on real devices. However, using emulators for initial testing and development can greatly speed up the development cycle because they can simulate a variety of conditions that no single device would exhibit.
For a general discussion of running apps on an Android emulator, see this User Guide. To configure a basic Android Virtual Device (AVD)
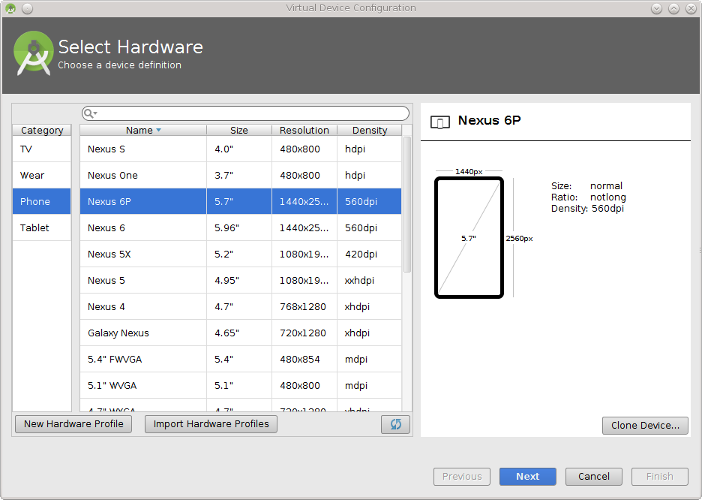
In the resulting window, select the category of device and specific device to emulate.
|
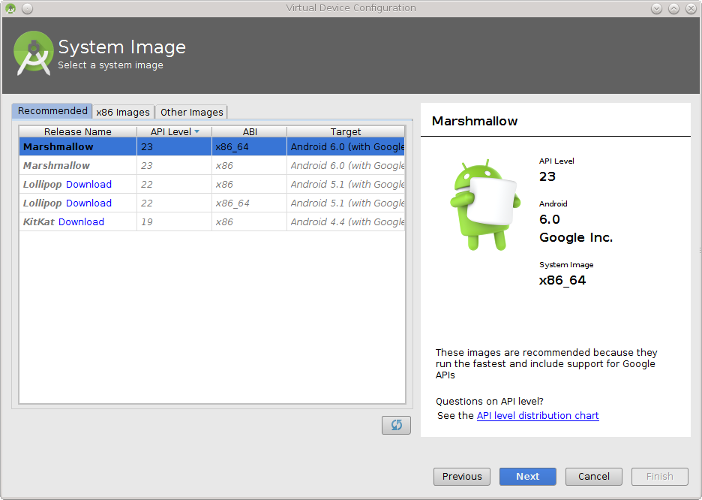
In this example we have chosen to configure an emulator for a Nexus 6P phone. This means that the emulator will have the look, and most of the functionality, of a Nexus 6P. Once you have selected the device emulator, click the Next button. This launches a new window to select the operating system that we wish our emulator to run, as illustrated below.
|
In this example Marshmallow (Android 6.0) has been chosen to run on the emulator.
|
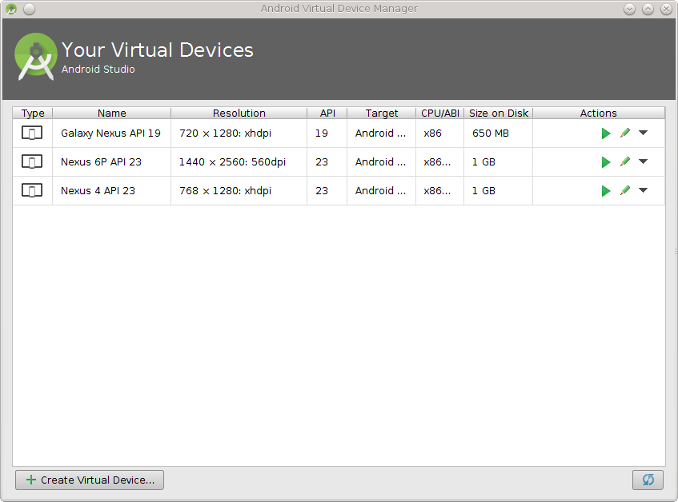
Close the Android Virtual Device Manager window. You now have added a basic AVD with the characteristics you specified. When the AVD manager is opened again, you will be presented with a list of the AVDs that have been created, as illustrated in the following figure.
|
From this window you can run an AVD by clicking its Run button (green triangle under the Actions tab), or add a new one by clicking the Create Virtual Device button at the lower left. You can also edit, delete, duplicate, ... an existing AVD using the options under the Actions tab.
Clicking the Run button for the Nexus 6P emulator in the list will launch it (be patient; depending on your machine speed, it may take a minute or two for initial opening) to give the following image.

|
A simple example of using such an AVD to display an app is given in Installing Sample Packages.
|
AVDs are slow to launch but perform much more efficiently once enabled. Thus, if you are going to use an AVD in development it is good practice to open it to begin with and leave it open while you develop, rather than launching it each time that you need it.
The AVD manager can also be launched directly from the command line with the command android, and you can configure an AVD directly from the command line; type android --help create on a command line to see the list of available options. |
Last modified: June 10, 2016